Sunday, October 20, 2019

Review - The 22-inch Weber Kettle Grill


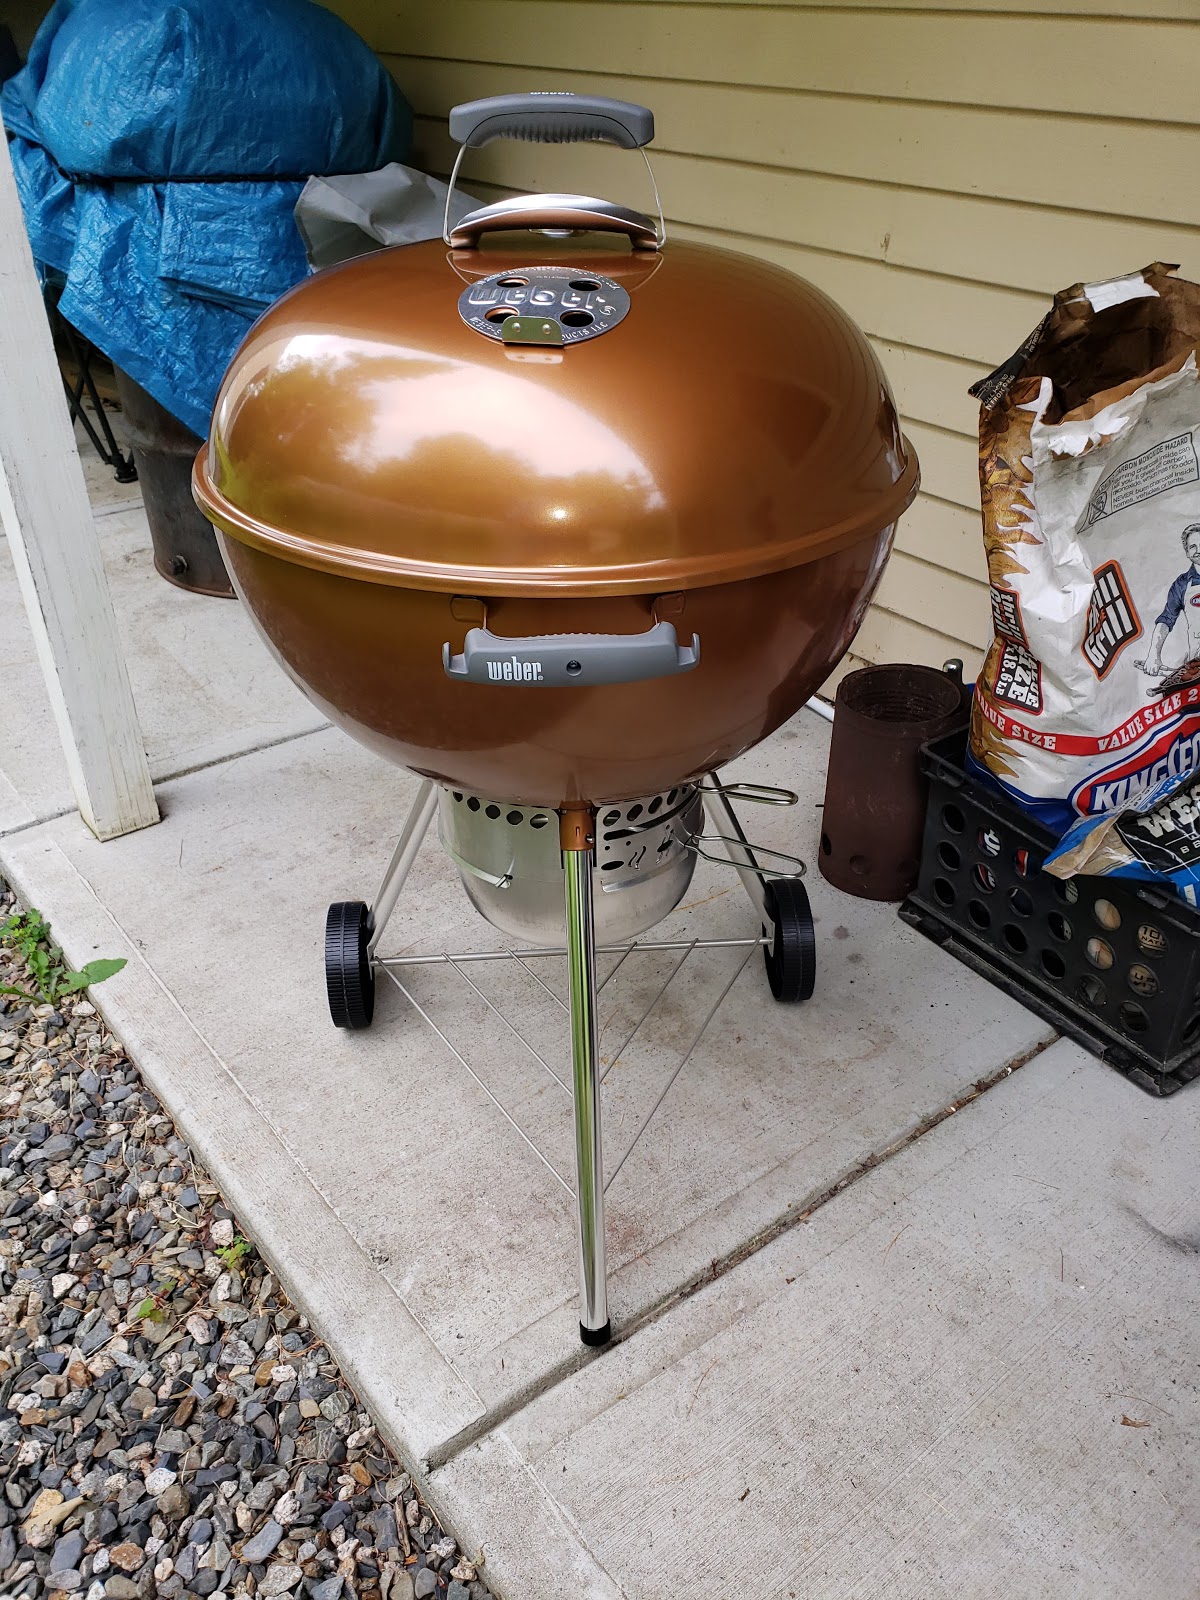
I don't know if a marketing guru has already come up with this, but if not, the Weber kettle grill should be called the Swiss Army knife of the barbecue World. I've used hibachi, gas grills, Offset smokers, ugly drum smokers and a variety of other outdoor cooking equipment but in all my years I've never had the opportunity to try an authentic Weber Kettle grill (I know, right? Have I been living under a rock?). Since me and the missus recently downsized our living arraignments, I had the bite the bullet and unload most of my outdoor cooking equipment. It was a sad day, but I do believe I may have discovered a suitable replacement. 
Chicken Pot Pie on the Weber Grill

 I like to smoke meat a lot, but I also like to grill and just generally cook outdoors. In a 3-bedroom home w/ a couple of acres for a back yard, it's easy to have a little arsenal of BBQ cooking weaponry to choose from. In a 2-bedroom apartment complex, not so much. I needed the most versatile cooker I could get. I opted for the classic Weber 22-inch kettle grill. I went with copper color because it was different than the traditional black, but that'd be my 2nd choice, were I to get another one (wink, wink).  
The grill comes packaged quite nice & secure and only has a handful of parts and requires only basic tools to assemble (screwdriver, hammer and the little wrench doohickey that comes with the grill). Me and the missus had it together on the kitchen floor in about 30 minutes. 
KFC=Kettle Fried Chicken! 
                           
There’s a couple of things to watch out for. Well, one really. Make sure the legs are set so that the front leg is under the grill handle and the two legs with wheels are to the back. I’ve seen a few videos where folks have missed this little detail. It won’t affect your BBQ, but it will certainly make moving the grill around a LOT more complicated!  

Snake Method on the 22-inch Weber Grill
The versatility of the Weber Kettle Grill is amazing. Using the coal baskets together or a Vortex insert you can achieve super-hot temps for searing or direct grilling. Moving the baskets to one side of the kettle allows for a large amount of indirect grilling area on the grate. Heck, I’ve even used the snake method with my charcoal briquettes and smoked pork butts for 8 to 10 hours with ease. A few weeks ago, we added a few fire bricks & a pizza stone to the grill and was able to make fantastic pizzas & calzones at around 600F!  

The Weber Kettle 22-inch kettle grill has damper controls below the kettle and on the lid. I’m still learning the ins and outs of the lid vent, but I am able to control my temperatures pretty easily with just the lower damper. The lower damper also does an excellent job of clearing ash from the kettle into the ash catching bowl mounted below the kettle. A quick squeeze of the ash bowl handle and the ash bowl un-clips from the kettle so you can easily empty ash from the grill.  
Texas Twinkies & Chicken wings on the Weber Kettle w/ the Vortex 
The cooking grate is stainless & high quality. The grate I got has the two wing doors on either side that lift and allow easy access to your heat source without having to remove a hot, loaded grill grate.  The lid fits well and, while it does leak a bit when smoking low & slow, it hasn’t really affected the outcome.  
Sesame Ginger Roasted Chicken on the Weber.
Hopefully someday soon I can get back to a place where I can have my whole arsenal on display again, but for now the Weber 22-inch Kettle Grill has become an outstanding substitute. So much that I don’t even like the term “substitute”.  Whether I get the Pit back together or not, the Weber is now a permanent member of the BBQ team. If you’re considering a grill purchase, I’d highly recommend this unit.  Two thumbs up for the Weber 22-inch Kettle Grill!  

The Vortex from Owens BBQ (more about this little monster later!)

Tuesday, February 20, 2018

Review - The Weber iGrill2 Bluetooth Connected Thermometer


I am a “gadget guy”, so it is no surprise why I got so excited when my son handed me the Weber iGrill2 Bluetooth Connected Thermometer. One gift to cover two passions -gadgets and BBQ – the kid has been paying attention!

Lots of seasoned BBQers have honed their skills to the point where they can test done-ness by touch and appearance. I have not attained that level of BBQ skill yet, so I rely on thermometers and temperature probes.

Now, on their packaging Weber tells me that with the iGrill2 I’ll be able “grill and smoke at an award-winning level”. I can tell you with complete confidence, if your BBQ game isn’t already pretty strong, a thermometer is not going to take it to an award winning level. However, for most people, an accurate and reliable thermometer is very helpful in produce quality BBQ. Especially one that is not tied to the Grill/Smoker. The iGrill2 fits the bill.

                                                                  Here's what you get
        

The iGrill2 comes with a base station capable of handling 4 temperature probes simultaneously. With the click of the right or left arrow on the base station you can switch between all four probes, allowing you to cook four different products that the same time. Since I’m not BBQ’ing enough to feed an army in most cases, I just use two probes for my cooks. One for the meat and one for the ambient temperature of the smoker/grill. Each probe is color coded to coincide with the probe channels on the Weber iGrill app. The app allows you to choose the probe for ambient temperature.

                                                            The Android App-Home screen


The iGrill2 comes with 2 probes included, but if you need more, they’re fairly inexpensive (i’ve seen them for about $15-$20 for 2) Each probe is high heat resistant and Weber claims they’re good up to 620F. I have not tested that claim, but I have maintained temps of 450F and had no problems. The base station is powered by 2 AA batteries (included). It’s also magnetized so it can be attached directly to your smoker/grill. I believe the rubber base is heat resistant. I haven’t read that or been told it, but I’ve attached mine to the side of my Ugly Drum Smoker (which probably gets up to 250F or more.) and I’ve experienced no melting rubber or deformities. I can say, with confidence, that up to about 250F, you’re safe. Over that and you may have melted pile of plastic – I don’t know and I’m not willing to test it. When in doubt, just set the base on a shelf. The probe leads are four feet long and come with nifty little plastic doohickeys that make it easy to wrap and store the probes neatly when you’re done

                                        iGrill probe and nifty plastic doohickey to wrap the probe lead


The Weber iGrill app that connects to your iGrill2 is very simple to use. It connects easily, much like any other Bluetooth connected device. I’ll provide a list of connectable devices below. Once it’s connected and paired, the app allows a variety of ways to monitor your cook. Across the bottom of the app, you’ll find “Temperature” and “Timers”. The iGrill2 allows you to set reminders at their own “standard” temperatures. For example, a whole Chicken is well done at 165F, so choosing “Chicken, Whole” will automatically set the alarm for 165F. Alternatively, if you’d rather have your chicken at 160F, you can set the temperature alarm to your own custom temps.

                          
 All four probes in one place! 


Set up your own timer            View your cook in a graph                                                    


Under the Temperature tab, the app will display all four temperature probes simultaneously for a quick look. Tapping on the active probe gives you access to that specific probe. If you’re a color coordinated kinda guy or gal, the probes include colored probe indicators to allow you to easily differentiate your probes It also allows the option to select the probe as a “done-ness” probe or as an ambient temperature probe to monitor and maintain the temperature of your grill/smoker. The app also allows you to view your temperatures in a graph, showing the rise and fall of your temperatures over time. This gives you a very good idea of how to gauge things like the dreaded “stall”. It also allows you to upload or share screenshots of your temps to social media or just to save for your own analysis later on. The app also alerts you when the base units batteries are getting low. 

I’ve been using the Weber iGrill2 for a while now and I love it. I’ve tested the probes repeatedly and they continue to maintain accurate readings  over time (I test with both boiling water and ice water, because I’m just that obsessive.). Since my Smartphone is basically attached to the palm of my hand, it is super convenient to be able to whip it out while I’m doing other tasks and check on the progress of my prized BBQ.

The description states that the Bluetooth connectivity can reach up to 150 feet. I’ve not tested this with a measuring tape, but I wouldn’t argue with a that statement. I’d have to say my only real complaint about the Igrill2 is, although it’s far less than 150 feet between my recliner and smoker (maybe about 50 feet), the Bluetooth does not connect very well through walls & windows. I am sure that is not the fault of Weber, but rather just the nature of Bluetooth connectivity – it needs a direct line and doesn’t play well with obstructions. 

All in all, the Weber iGrill2 has definitely been one of the better gadgets I’ve gotten over the last few years. It’s used almost every weekend and has preformed admirably throughout. I use mine regularly in the smoker, grill and the conventional oven in my kitchen. I have had to replace one probe, but I’m pretty sure that was my fault for not being more gentle.

The iGrill2 comes with the following:

1 Base station
2 Probes
2 Probe wraps (doohickeys!)
2 Colored probe indicators
2 AA batteries
1 extra magnet

It’s compatible with the following devices:

iPhone 4S and later
iPad 3rd Generation and later
iPad mini and later
iPod Touch 5th generation and later
(requires iOS 7+)

Android 4.3+ (w/ Bluetooth technology)

The Weber iGrill app is available for free in both the Apple App Store or Google Play store.

Unfortunately, I don’t have any experience with comparable devices so I can’t tell you if it’s better than this unit or that unit, but I can tell you the device performs as described and has been a dependable addition to my BBQ Toolkit!


Sunday, February 18, 2018

Pulling the bone

Beef Button Ribs ( "Riblets", for the Applebees crowd)


I'm pleasantly surprised with the Beef Button Ribs we picked up at Super Wally World a few weeks ago. They had been sitting in the freezer for a while and I decided, since the wife wanted a pulled pork dinner, I'd throw on the ribs too.

We woke up to 2-3 inches of fresh snow this morning, so we had to go out and do a little shoveling before firing up the Ugly Drum Smoker.


Once we got the driveway cleared I loaded up the fire basket and lit a chimney full of charcoal. I'm using Hickory for this cook.  


We got the ribs and pork butt on by 9:30AM.  I always misjudge time with Pork Butts and we usually end up eating quite late. As I write this, I am hoping I got it right this time. It' s 2:00 PM and we're at 164F. I figure I'm in a stall right now and will wait until 3PM to see if I'm right. If so, I'll wrap the butt. If there' s no stall, I'll just keep trucking till we hit 205F.

Anyway, back to the ribs. I rubbed them with a combo of salt, black pepper, garlic powder and onion powder and let them rest for a couple of hours in the fridge.  At about 9:30 AM my UDS temps were around 250F-275F, so I threw on the butt and the ribs. I gave up fighting the UDS and just let it go at around 260F for about 3 hours. I took them off at the 3 hour mark and wrapped them in foil with a couple pats of butter on top for moisture. I would normally have splashed in some Apple juice but I forgot to buy some. 


After about 45 minutes in foil I pulled the ribs and removed the foil. Normally I would put them back on the smoker to dry out a bit from the steam in the foil, but with no real liquid  this time there was very little steam and the ribs came out with their bark intact. 

The plan was to have them tomorrow night for dinner, but after we each tried one, the rest went down the hatch pretty quickly thereafter.  
I wasn't holding out much hope for these Button Ribs, but like I said above, I was pleasantly surprised.  We'll definitely try them again!


Saturday, February 17, 2018

Sticky Asian Style Chicken Wings (or ribs!)


Ingredients


1 lb chicken wings & drumettes
4 cloves garlic
Apricot preserves jar
Hoisin sauce 1/4 cup
1/2 cup honey
1/4 c soy sauce
sesame oil 1 tbsp
1 tbsp 5 spice
1 lemon


Combine all ingredients and add liquid to 1 gallon plastic zip bag. Reserve a 1/4 cup to use as a glaze at the end of the cook. Massage wings to coat them all and refrigerate for at least 4 hours (we prefer overnight).
Cook the wings at 275F until they are brown and slightly charred, maybe an hour. At that point you can brush on a coat of the sauce you set aside earlier. Let the wings go for about 15 minutes between saucing, to allow it to carmalize. I usually sauce only once or twice. Once the sauce has caramelized, remove from the heat and enjoy!

BONUS! -this marinade also works wonderfully with ribs too! If you try it with ribs, cut the ribs first and then cook them individually. Also, you'll want to cook them at a lower temp (225F-250F) and for more time (probably 2-3 hours). Still worth the effort!! Delicious!  


Bad picture- great ribs!!

Basic Pork Dry Rub


Basic Pork Rub

1/4 cup Paprika
1/8 cup Fresh Ground Black Pepper
1-2 tablespoons Garlic Powder 
1-2 tablespoons Onion Powder
1 tablespoon or more Cayenne Pepper
1/4 cup Kosher Salt
1/4 cup Brown Sugar (or you can sub Turbinado Sugar )